
CNN ~ draw by hand ✍️


“What should I do for my AI project?” my son asked me.
A few weeks ago, my wife encouraged my son to participate in the Presidential AI Challenge organized by the White House. The challenge is about developing an AI solution to address a community problem. My wife also encouraged (assigned) me to be the adult mentor.
I teach AI to a lot of people. But teaching AI to your own child? That’s a completely different ball game.
While thinking about how to guide him, I went through various agentic frameworks. I didn’t know which framework to recommend; these frameworks are constantly changing. I was struggling.
Then, I came across a drawing he made ten years ago. If there’s one thing that hasn’t changed, it’s his love for drawing.
So I suggested: draw AI.
The community problem to solve:
AI is making people forget their love for drawing
Initially, there was some protest. But he quickly discovered how enjoyable it was to draw, while learning about AI. Then, he went above and beyond. He drew and wrote a total of six chapters, entirely by hand. His “AI solution” is probably the only pen-and-paper solution, among the thousands of agentic AI solutions submitted to the presidential AI challenge.
Looking 10 years ahead. A lot will change. NanoBanana and MidJourney may be forgotten and replaced by something newer. But I know one thing won’t change: his love for drawing.
Here is one of the chapters Luke agreed to share with you:
How to Draw a CNN in Six Steps ✍️
(drawn and written by Luke Yeh)
In this step-by-step guide, you will learn the mechanics behind convolutional neural networks through drawing it by hand. The diagrams throughout are completely hand-drawn to make each step easier to read and follow.
Let’s begin with a quick overview.
What Is a Convolutional Neural Network?
A convolutional neural network (CNN) is a kind of deep-learning model designed to detect patterns and features in its input data, most commonly images. Instead of processing an image at once like a dense neural network, it works by sliding a filter, or a kernel over an image to process it piece by piece. As these filters move across the image, they identify features such as edges, textures, or shapes in the process. When multiple layers are stacked together, as the network combines their collective learned data to recognize increasingly complex patterns.
But what does this look like in practice?
Consider an image classification task, where a model is provided a set of images and asked to distinguish all cats from dogs. For a standard neural network, this might be challenging. In processing the image as a single, flattened set of data, it loses all spatial structure, meaning that a dog’s ear becomes just another group of numbers, same as any random assortment of pixels in the image.
For a CNN, the benefit comes from analyzing the image in sections. By doing this, it is able to recognize the spatial relationships between pixels, allowing it to contextualize the data (e.g. recognizing body parts).
How Do CNNs Work?
Let’s explore how convolutional neural networks work.
Step 1 - The Input
Lets start with an input image - it can be of anything. Here, I’ve drawn a house.
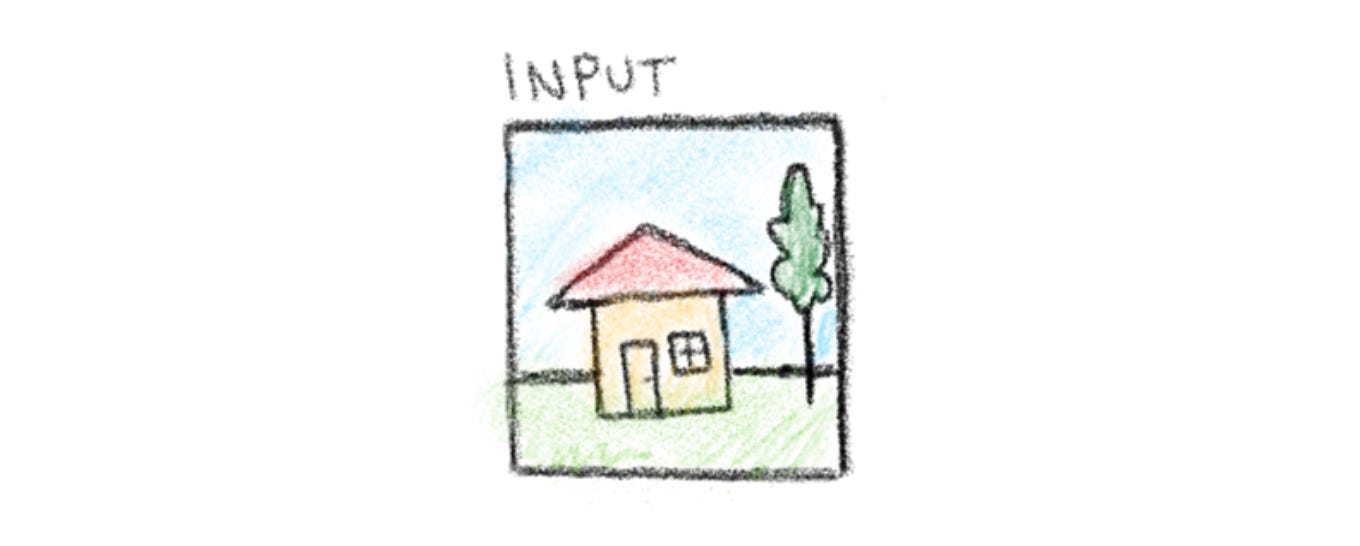
This image will be the input data our CNN processes piece by piece to detect patterns and features.
Step 2 - Convolution
To illustrate the process of convolution, draw a box on the image to represent the kernel, or the portion being analyzed. This data will then be processed and fed into a box under the input data, representing the convolution operation in action.
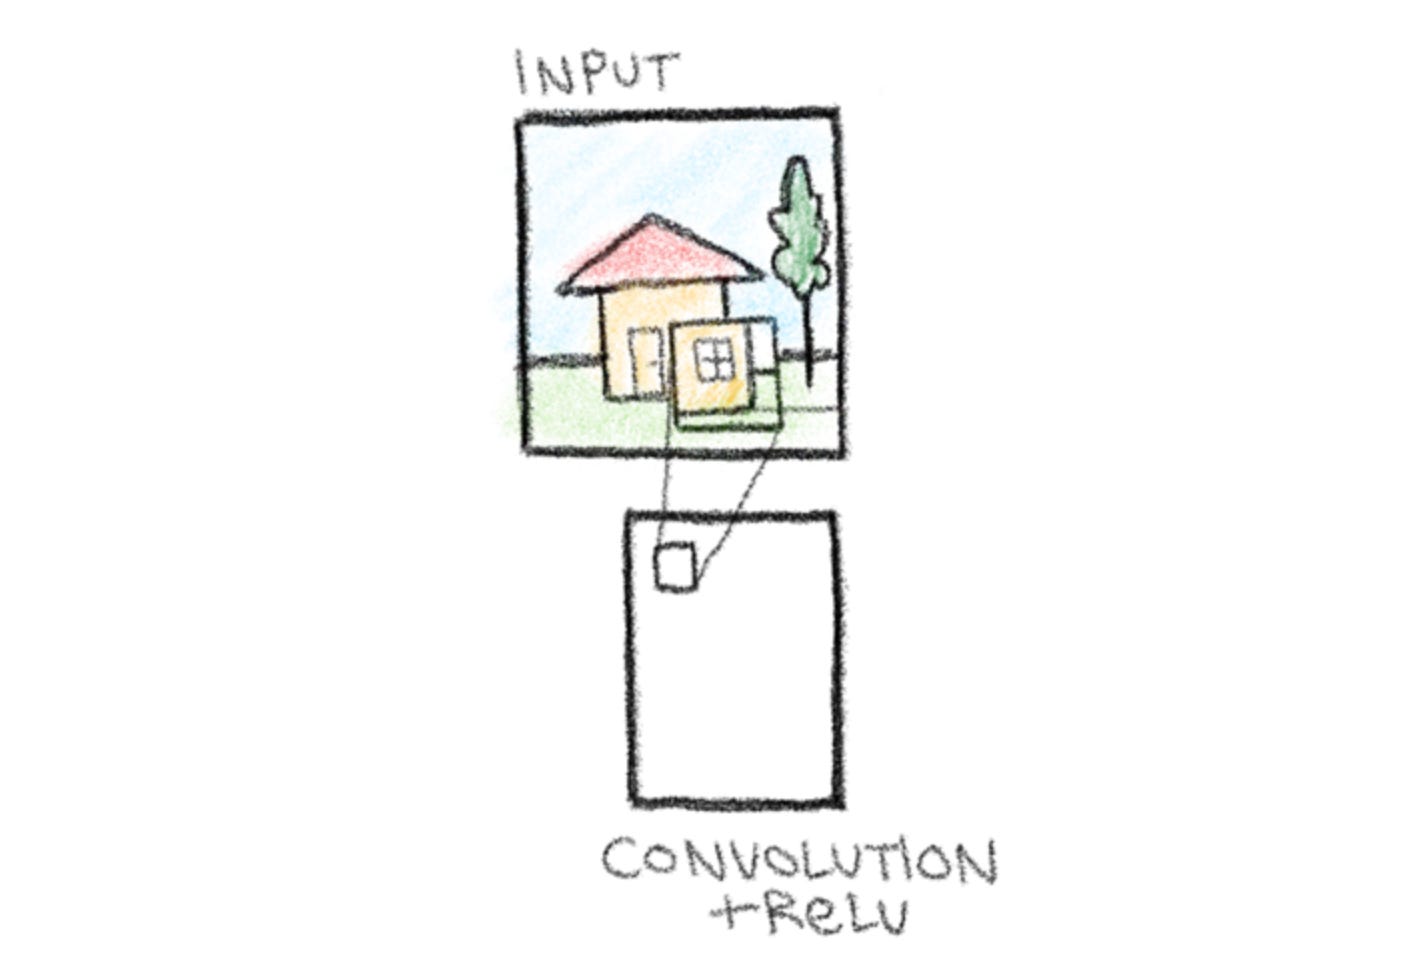
You might have noticed the ReLU in addition to the convolution. ReLU is a type of activation function that sets all negative values in a data set to zero while leaving positive values unchanged. In this context, this serves the role of introducing non-linearity into the network, allowing it to recognize more complex patterns.
Step 3 - Pooling
Next, continue the network by adding another box to the right. This represents a pooling layer, which compresses the information produced by the convolution layer. Pooling reduces the size of the spatial dimension (width and height of the feature maps) by removing redundant or less important information while keeping the most important features. This is essential for reducing the computational load later down the line, as the removal of extra parameters allows the model to operate faster and more efficiently.
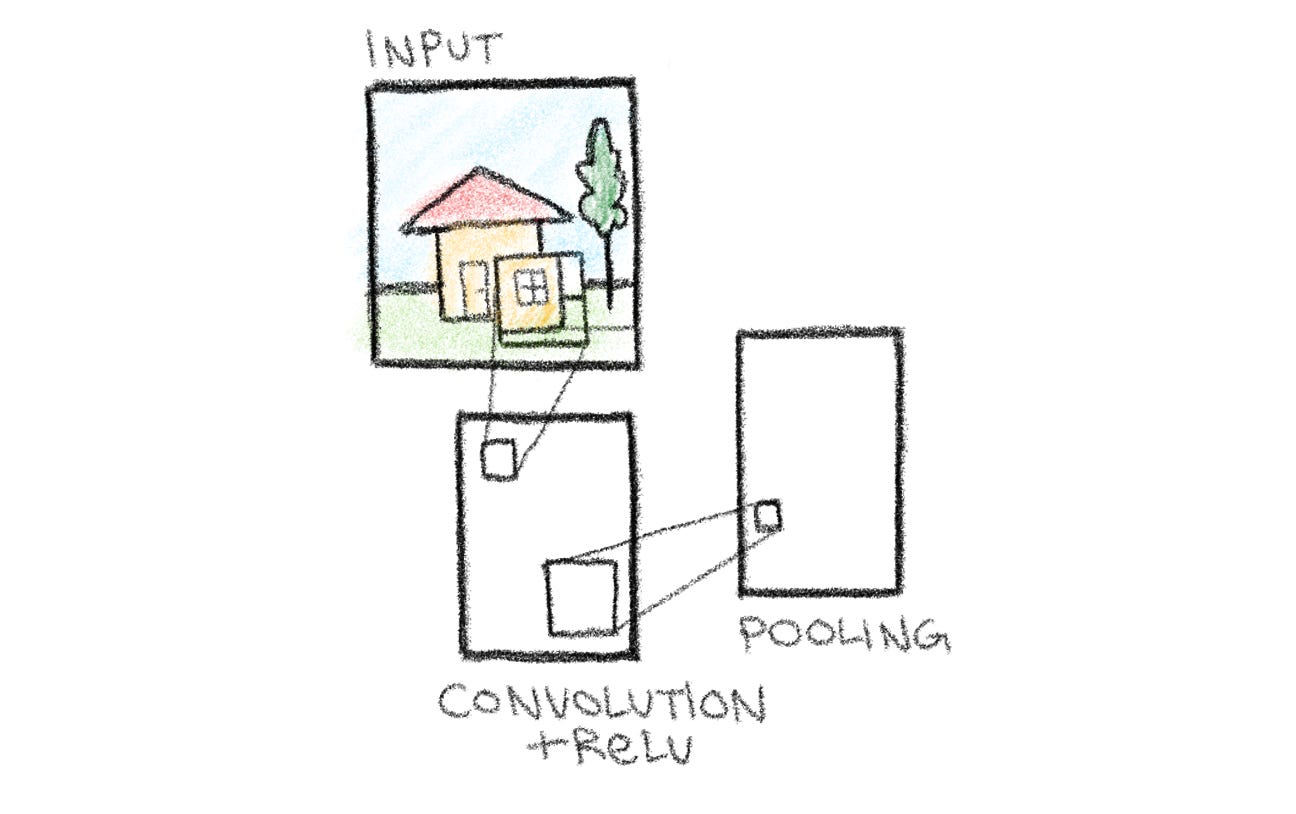
Another important purpose of the pooling layer is to help the model recognize patterns even with small shifts in position or size. In other words, even if a feature appears slightly to the left or right, or slightly larger or smaller than expected, the network can still recognize it.
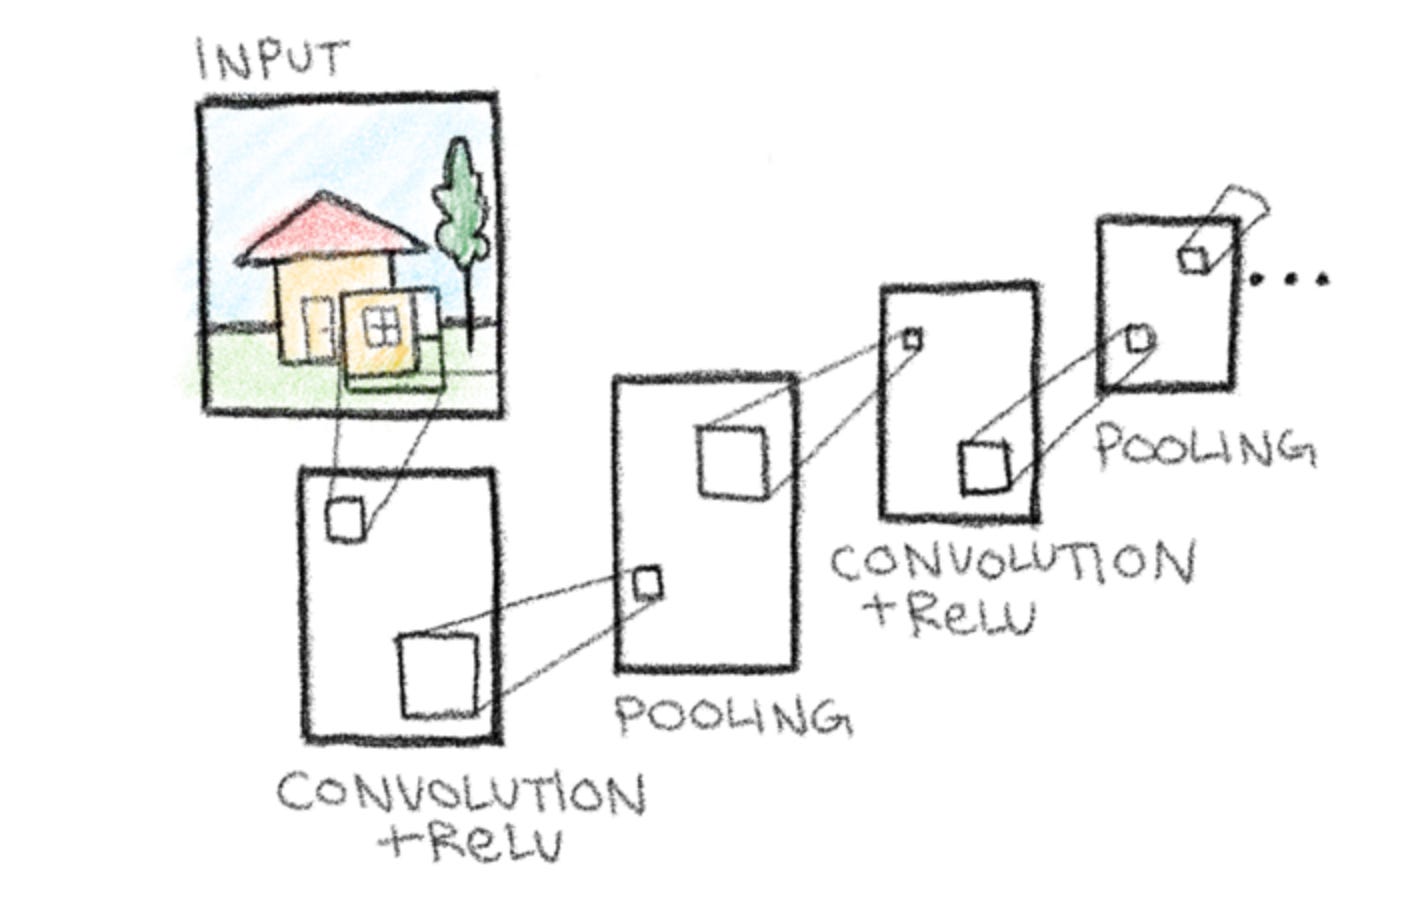
Step 4 - Repetition
In a full CNN, the convolution, ReLU, and pooling steps are repeated multiple times. Each repetition allows the network to recognize progressively more complex features. Since we’re limited in space, we can represent this process of repetition through repeating the sequence of convolution into pooling once using boxes. The rest we can show using simple dots.
Step 5 - Flatten
Let’s add the flattening stage in now. After several rounds of convolution, ReLU, and pooling, our feature maps are still multi-dimensional grids. Flattening converts these grids into a single, one-dimensional vector of numbers. This can then be fed into a fully connected layer, which requires one-dimensional input.
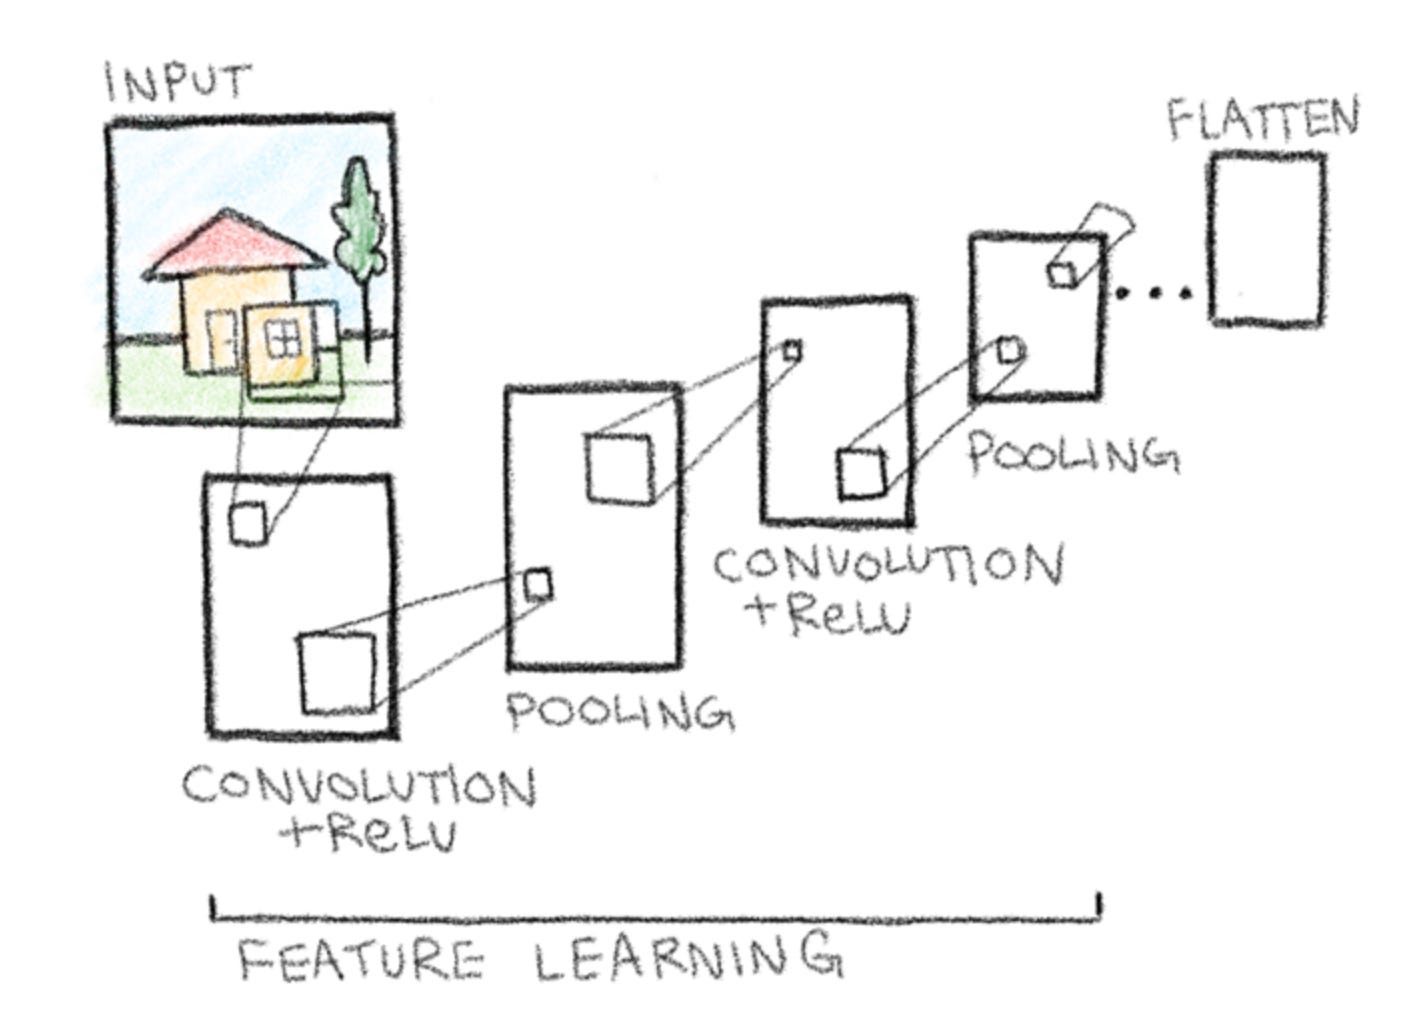
Additionally, label the convolution and pooling sequence as feature learning, the part of the network responsible for detecting and extracting patterns from the input image.
Step 6 - Classification
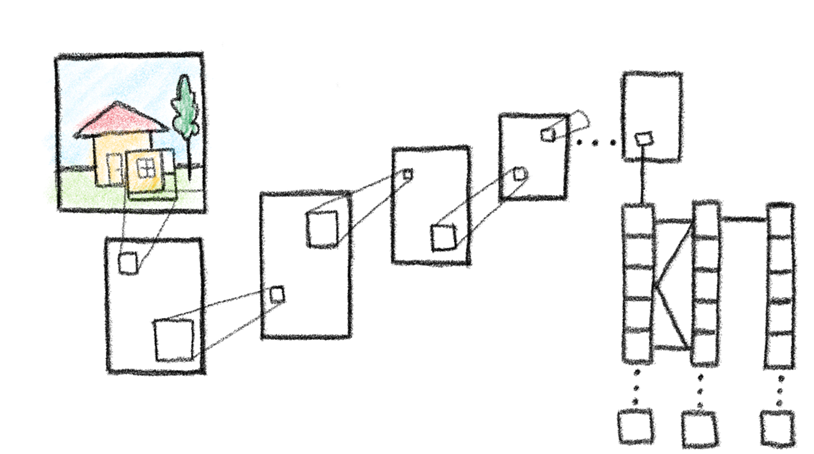
After flattening the feature maps into a single vector, the network passes this data into one or more fully connected layers, also known as dense layers. We’ll use stacked boxes to represent this stage, labelled classification.
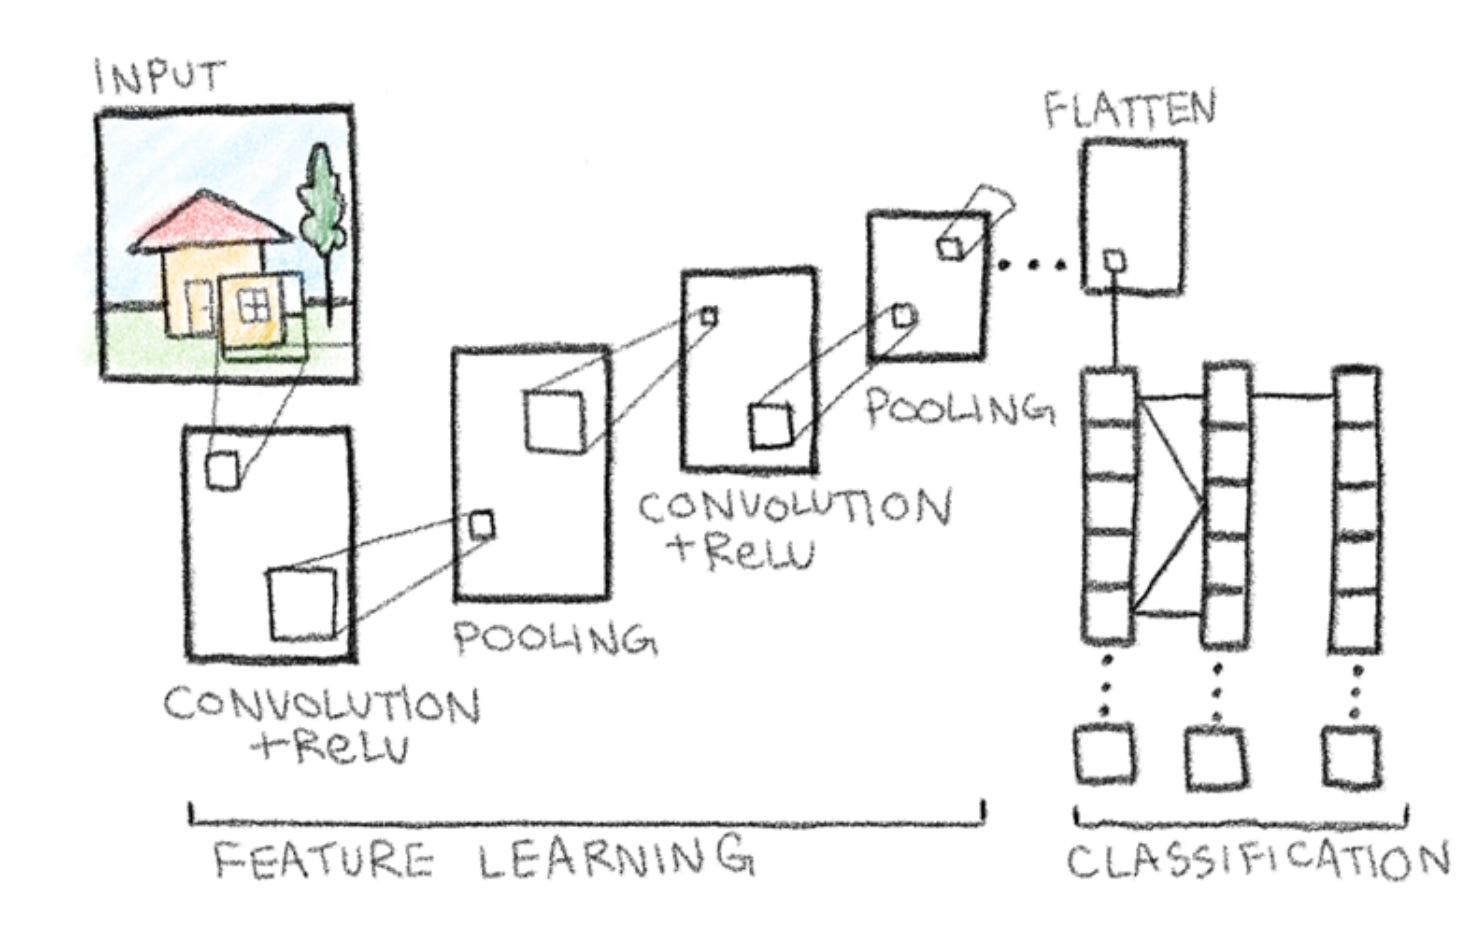
In a dense layer, each neuron assigns a weight to every input value from the flattened vector. These weights determine the impact that feature has on the final prediction. The neuron sums all the weighted inputs and then applies an activation function, typically ReLU, and passes it on to the next layer. In our diagram, this is shown by the lines connecting the layers. Throughout this process, the network learns which features are most useful for distinguishing between classes, for example whether the image contains a cat or dog.
Let’s visualize this using our example. Keep in mind that the prediction will be different depending on your input image.
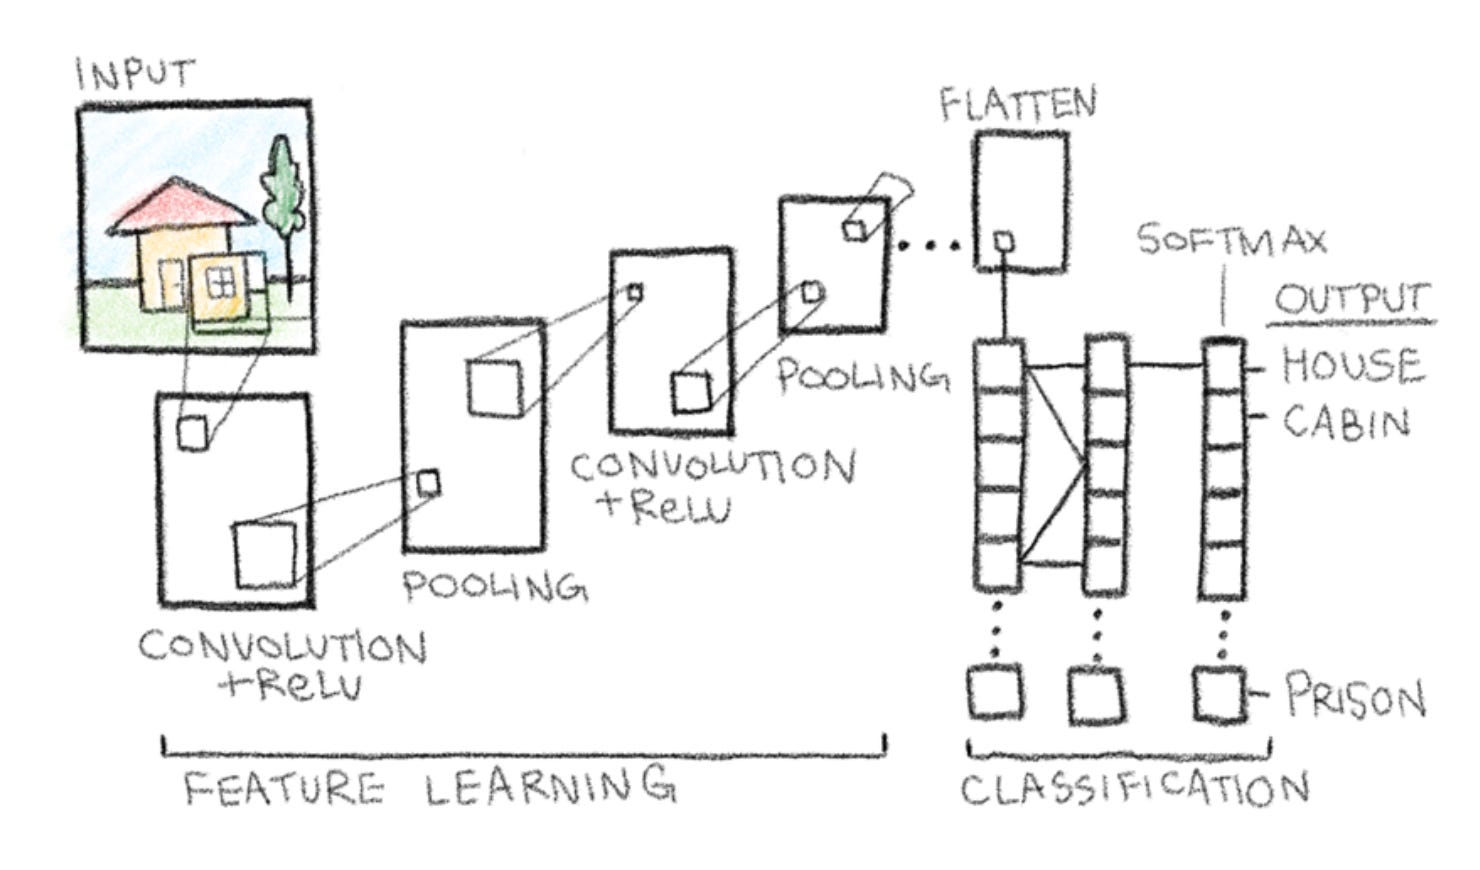
Before determining the final output, a softmax function is applied to the dense layer, turning logits, or raw scores, into probabilities between zero and one. In this example, the highest probability is a house, with cabin being a close second. Similarly, prison is at the bottom, just as expected.
Conclusion
I hope you enjoyed this short, hand-drawn guide to CNNs. By breaking down each step from the input to the classification, I learned a ton along the way, and I hope you did too by following along. I hope it inspires you to apply this process of learning yourself, and sketch out your own neural networks step by step, and thank you for reading.
~ Luke
Great! thank you for sharing.
Awesome example and explanation, thank you ! Could you also illustrate a similar example and explain in the context of Knowledge graphs please ?